
| 10. myMaterial-Manager 10.1 Structure of myMaterial-Manager 10.1.1 Select colour, material and favourites 10.1.2 Export colour, material and favourites 10.1.3 Return to SPECTRUM 5 11. Colour true- Calibration - ColorMunki 11.1 Simple colour optimisation (without ColorMunki) 11.1.1 Calibration 11.2 Calibration with ColorMunki 11.2.1 Display profiling 11.2.3 Import of colour hues to SPECTRUM 5 12. SUPPORT 12.1 Training 12.2 Website 12.3 Contact |
11.2.2 Printer profiling
If you want to ensure true-colour printouts which are not dependent on individual printer models and to compensate for series variations, wear and tear etc., we recommend using a spectral photometer to create individual colour profiles. It should also be obvious that the paper and inks used are just as important to the end result. Please understand that we cannot cover the entire printer market. We have tested individual printers, however, and are happy to provide you with the corresponding profiles. One printer we have found to be reliable is this one: http://www.canon.de/For_Home/Product_Finder/Printers/Professional_Photo_Printers/PIXMA_Pro_9500_Mark_II/ We have tested the following printer papers:
During our tests, it became apparent that the calibration software used is also a factor. We are extremely satisfied with the results of ColorMunki spectral photometers and the corresponding software from X-Rite. The results were excellent for various printers, papers and logical settings. The ColorMunki Photo and ColorMunki Design models are equally well-suited. The ColorMunki SPECTRUM, which Caparol previously distributed in a bundle with the SPECTRUM 4.0 software, also works very well. These models also let you use additional features in SPECTRUM 5 - as was also the case with SPECTRUM 4.0. Canon also offers calibration software for the printer, but we were not entirely satisfied with its profiles. In the first step, connect the ColorMunki to a functional USB port on your PC. In the program's main navigation, click "Extras">"Colour settings">"with ColorMunki...". If the ColorMunki has been connected correctly and is active, the following dialogue opens: 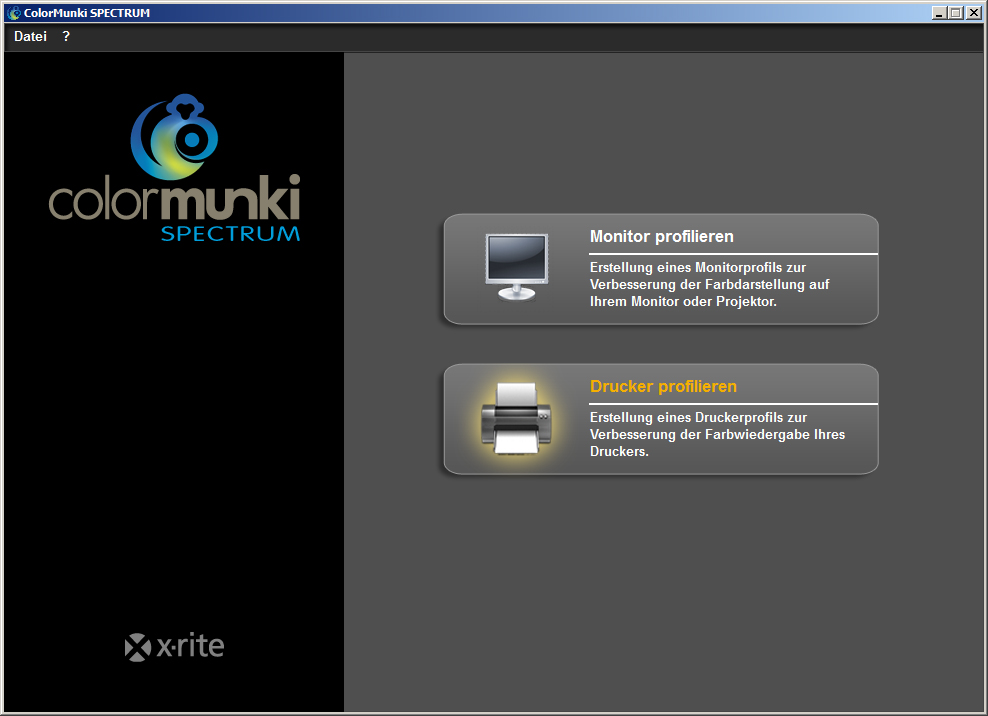 Click "Profile My Printer" to select it. You will now be guided step-by-step through the profiling procedure.
Start printer profiling When you start printer profiling, first choose whether you want to create a new profile for a printer or optimise the existing profile for your printer. In the next step, select the printer you want to profile. Then specify the type of paper you use with the printer being profiled.  Note: A separate profile must be set up for each individual printer and each type of paper you use with the respective printer, to guarantee colour fidelity during profile creation.
Then click "Next" to print so-called "Targets" (target sheets with colour field compositions for importing) for your ColorMunki. Print first target Click "Print" to print the first target or, if you already have a printed target, select "I have already printed my target". 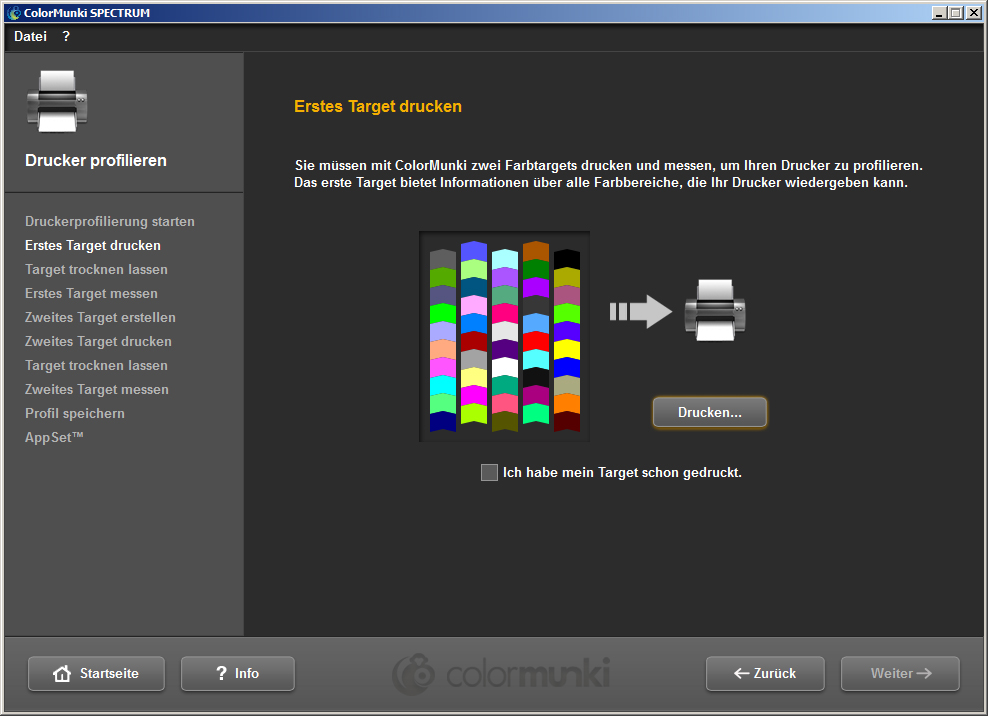 Read the notes shown before you open the print dialogue and then click "Next". Click the respective settings in your print dialogue, select the required printer and then click "OK" to print the first target.
Click "Next" as soon as the target has been printed. Allow the target to dry In the next dialogue, the drying time required for the target is shown in a countdown. Please wait until the timer has expired before you starting measuring the target. Note: If you have a target that is already dry, you can skip the drying process by clicking "Skip Drying Process". Then click the "Next" button to continue measuring.  Measure first target
Now measure the first target by applying the ColorMunki at the bottom end of the first line (before the first colour field). Click the function button for the ColorMunki and move the line from bottom to top as straight as possible with the button pressed. Only release the button when the ColorMunki is no longer over the colour field. If the line has been measured correctly, the yellow frame in the display dialogue moves to the next line. If the line has been measured incorrectly, it will have a red frame round it. You can only measure again when the frame appears green. 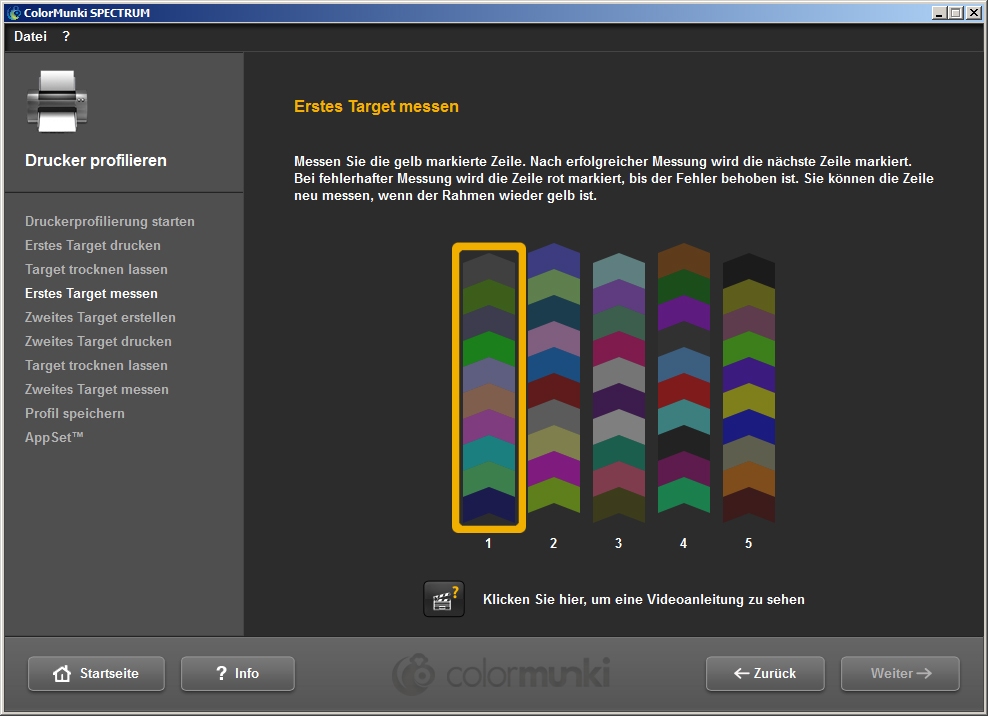 When you have measured all five lines correctly, click "Next". The second target is then created for you.
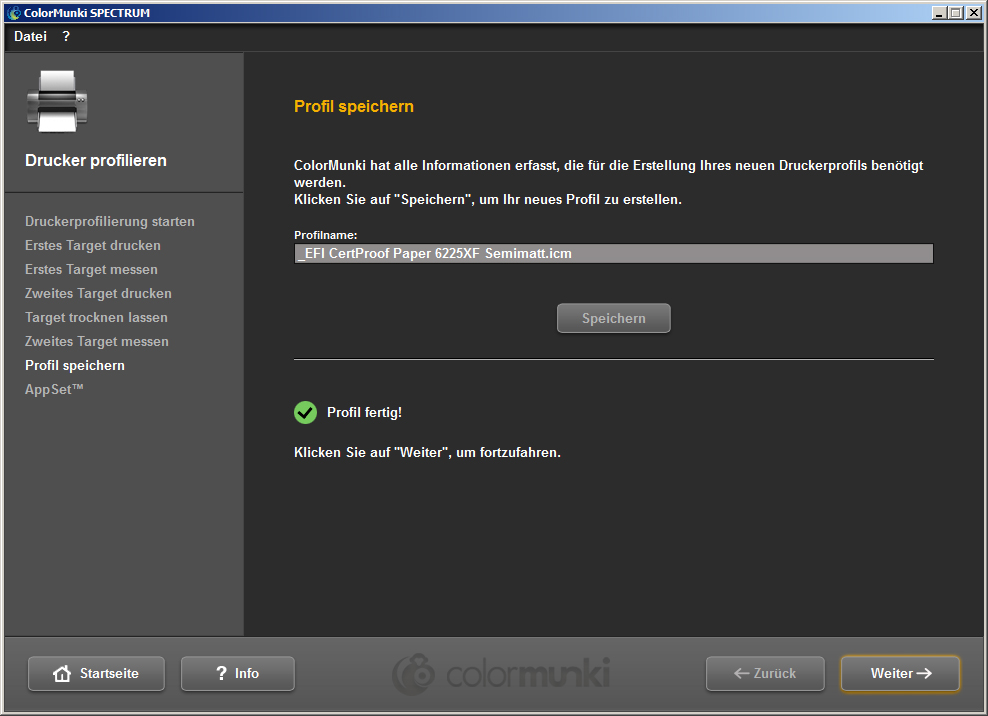
Second target Proceed with printing, drying and measuring the second target exactly as with the first one. The second target cannot be skipped like the first one, since it is only being created by the current measuring values. 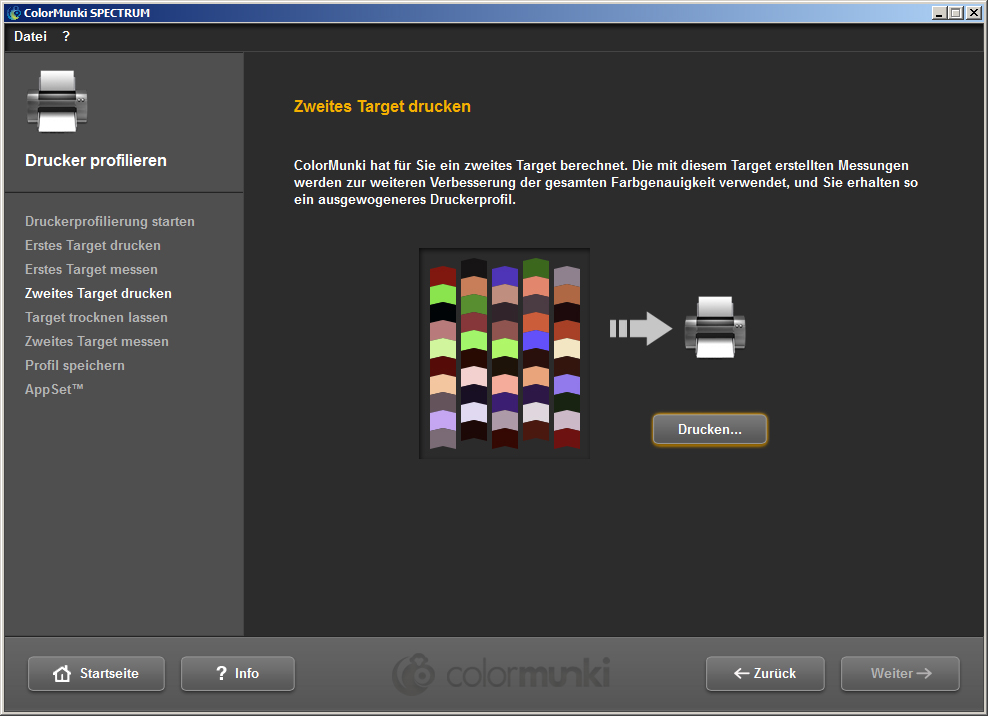 Save profile After the series of colours has been imported, the "Create profile" dialogue opens. Here, you can save the new profile created on your PC under the suggested profile name or a name you choose yourself. To do this, click "Save". The program now calculates the profile for your printer. After this, you can create a reminder date for the new profile. Then click "Next". Note: If the system has not been able to carry out the profiling process properly, the profile created cannot be saved and you see a system message that profiling has failed. Make sure that you have the necessary administration and writing privileges on this PC and repeat the procedure. 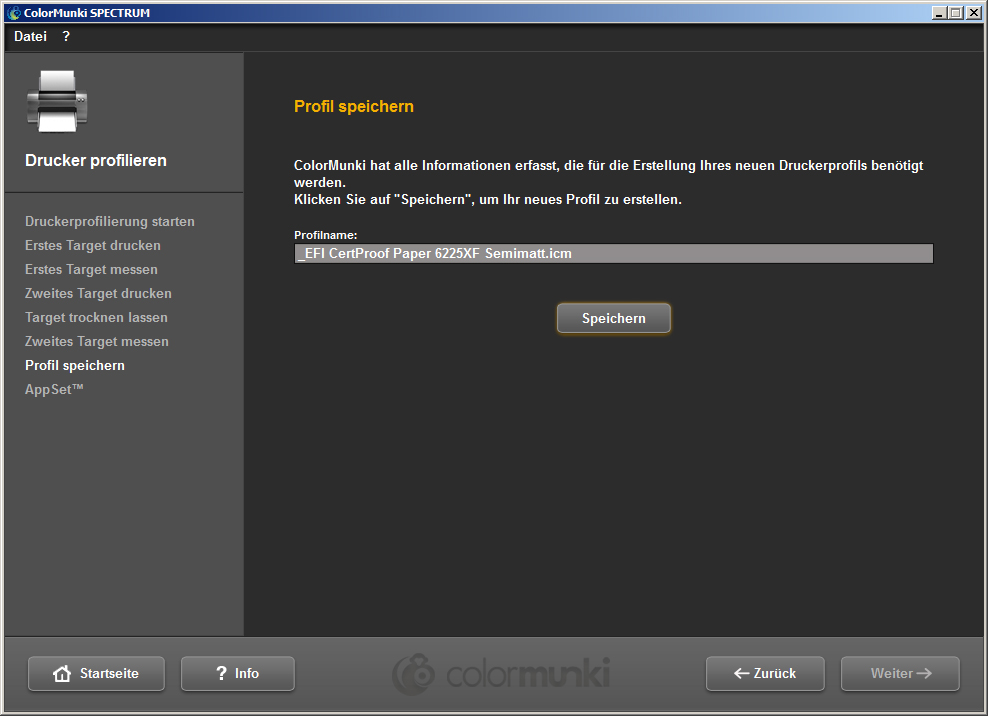
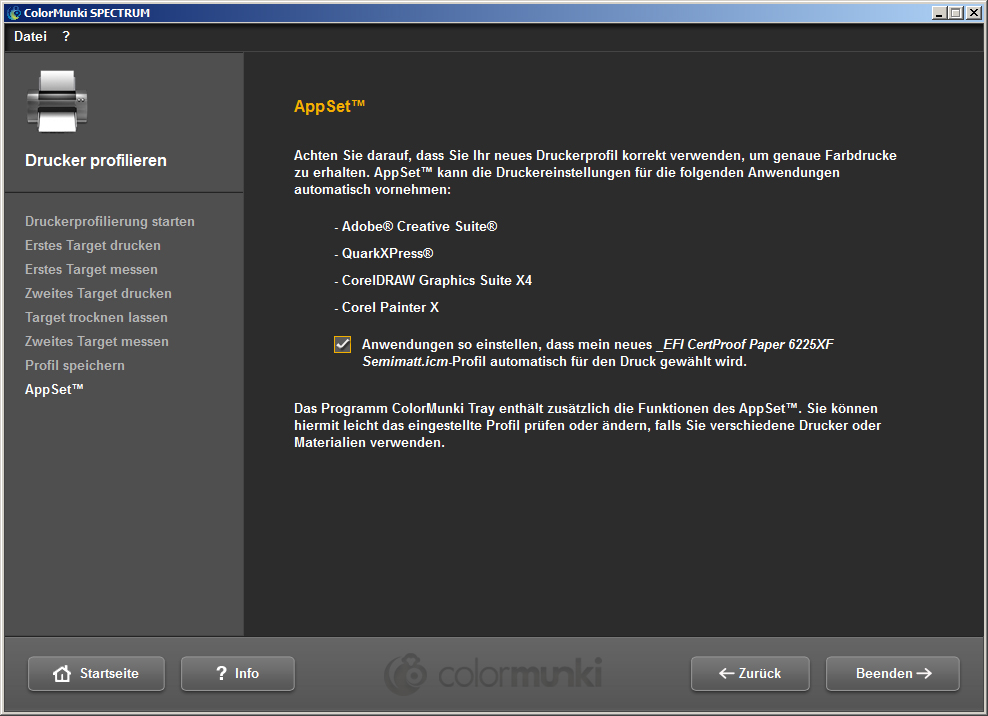 AppSet With this function, X-Rite offers automatic import of your printer profile to other programs such as Adobe Creative Suite, CorelDraw or QuarkXPress. To guarantee the reliable correct colour profile import for other programs, we recommend the method shown below on the basis of Adobe Photoshop CS5 rather than using the AppSet function. Print settings for Adobe Photoshop CS5 using a profile created with the ColorMunki In the main menu of Photoshop CS5, choose "Edit">"Colour settings". In the "Colour settings" menu window that subsequently opens, choose the profile you have created with ColorMunki for the "Workspace colours>RGB workspace colour" area and confirm the changed settings by clicking "OK". 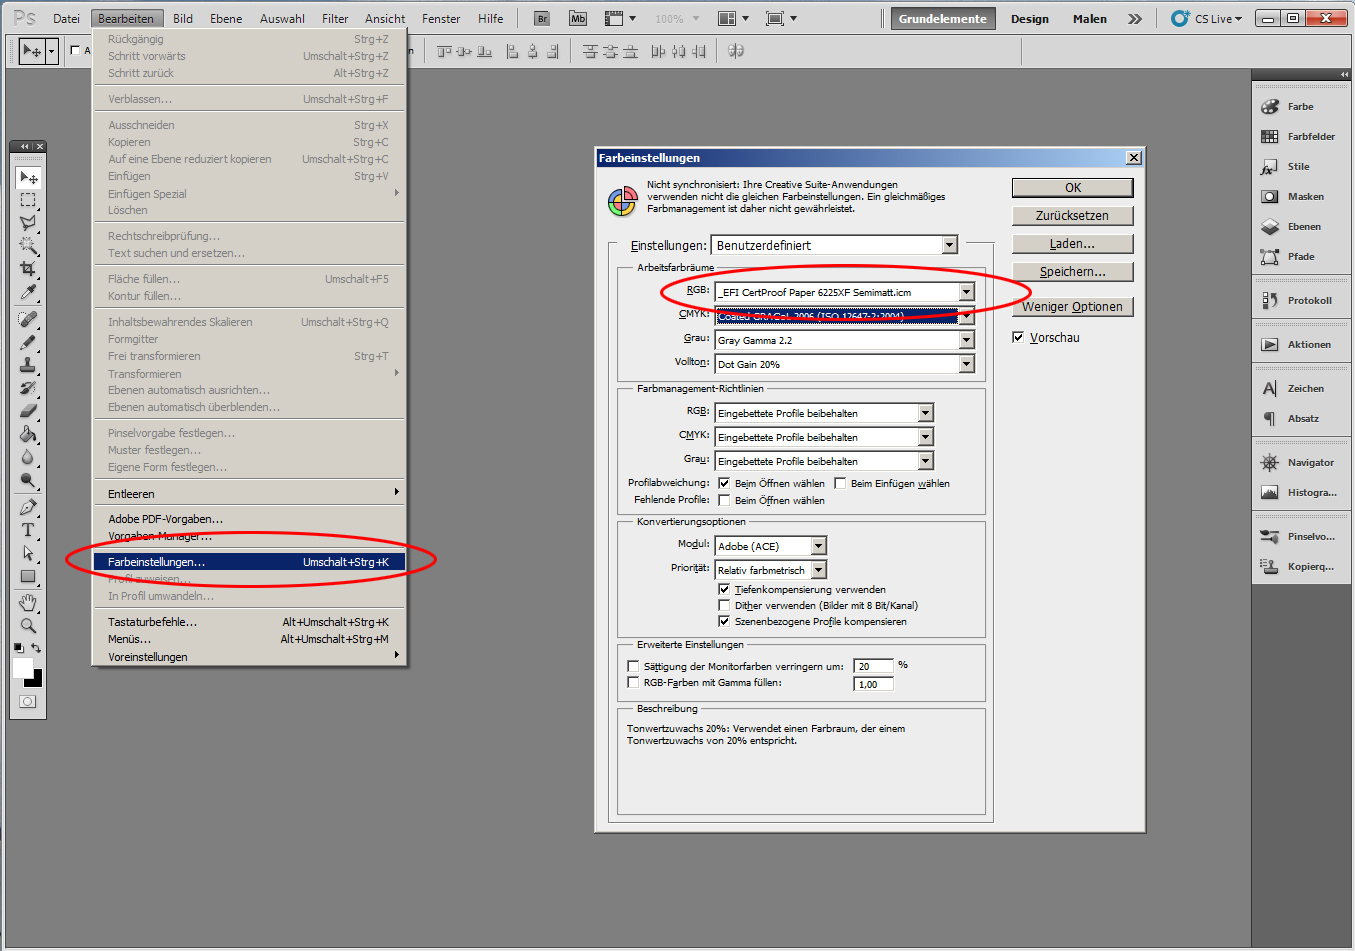 Then open the Photoshop print dialogue by clicking "File">"Print" in the main menu and carry out the following settings in the dialogue that opens:
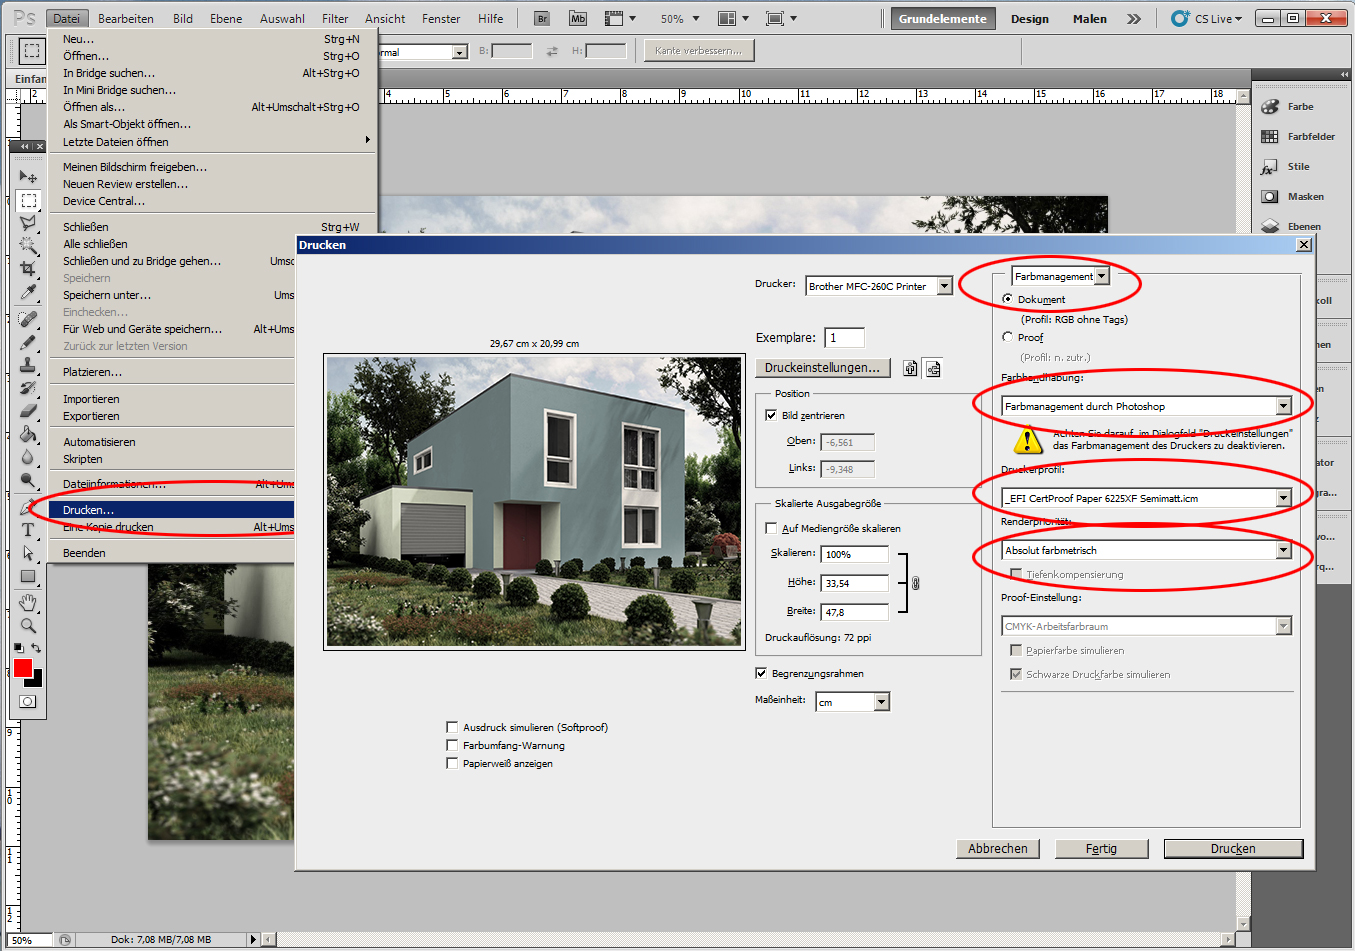 Note: Do not forget to deactivate the colour management in the printer dialogue window.
|