
| 10. myMaterial-Manager 10.1 Structure of myMaterial-Manager 10.1.1 Select colour, material and favourites 10.1.2 Export colour, material and favourites 10.1.3 Return to SPECTRUM 5 11. Colour true- Calibration - ColorMunki 11.1 Simple colour optimisation (without ColorMunki) 11.1.1 Calibration 11.2 Calibration with ColorMunki 11.2.1 Display profiling 11.2.2 Printer profiling 11.2.3 Import of colour hues to SPECTRUM 5 12. SUPPORT 12.1 Training 12.2 Website 12.3 Contact |
11.2.1 Display profiling
In the first step, connect the ColorMunki to a USB port on your PC. In the program's main navigation, click "Extras">"Colour settings">"with ColorMunki SPECTRUM...". If the ColorMunki has been connected correctly and is active, the following dialogue opens: 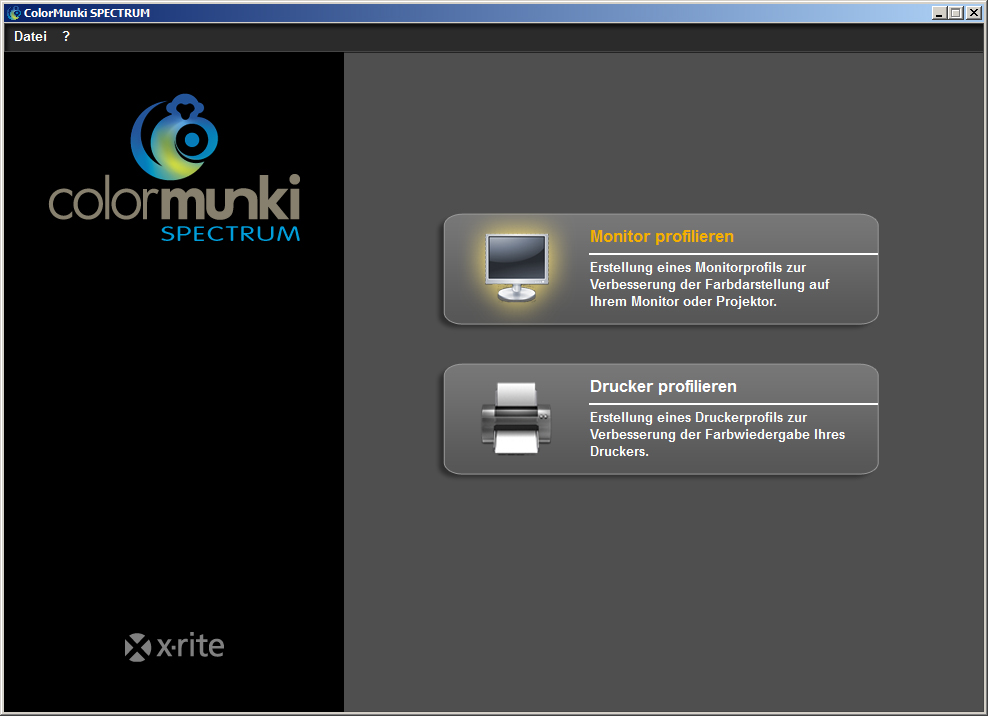 Click the "Profile My Display" field to select it. You are now guided through the individual steps necessary for profiling.
Select display type First, click the "Display Type" you want to profile. You have the choice between LCD, laptop or projector. Then, in the next step, decide whether you want to carry out "Easy" or "Advanced" profiling. 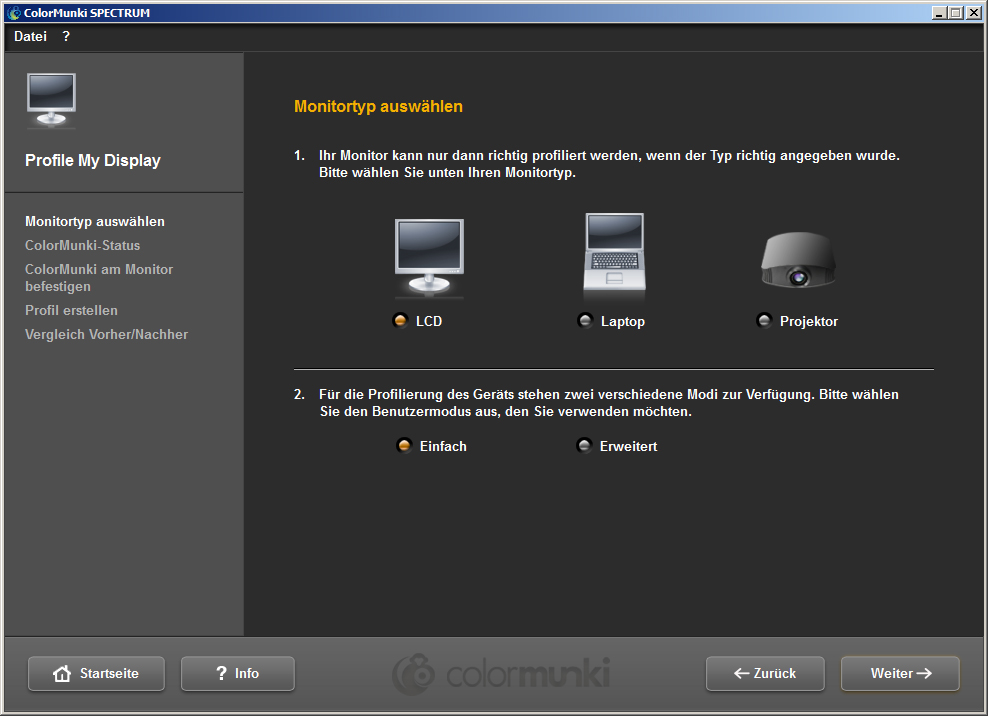 Easy profiling
Easy profiling accesses basic settings that trigger standard profiling of the display. This setting is suitable if you do not want to include any special settings for ambient light and luminance in the profile. Advanced profiling When advanced profiling is selected, you can measure the ambient light or set the luminance for your pro- filing manually. In addition, you can define different types of light in the white spot area. Choose "Set display luminance for the ambient light" if you do not require any special settings for luminance. If you wish to set luminance manually, select "Set display luminance to this reference value" and then set the required luminance between 80 and 140 Candela in the field on the right. Depending on your requirements, you can specify the white spot between D50, D55, D65 (standard) and native. Then click the "Next" button to continue profiling.  ColorMunki status In the following "ColorMunki Status" dialogue, SPECTRUM checks whether your ColorMunki is ready for a profile to be created. If the ColorMunki has not been connected to the PC correctly, the following dialogue appears: 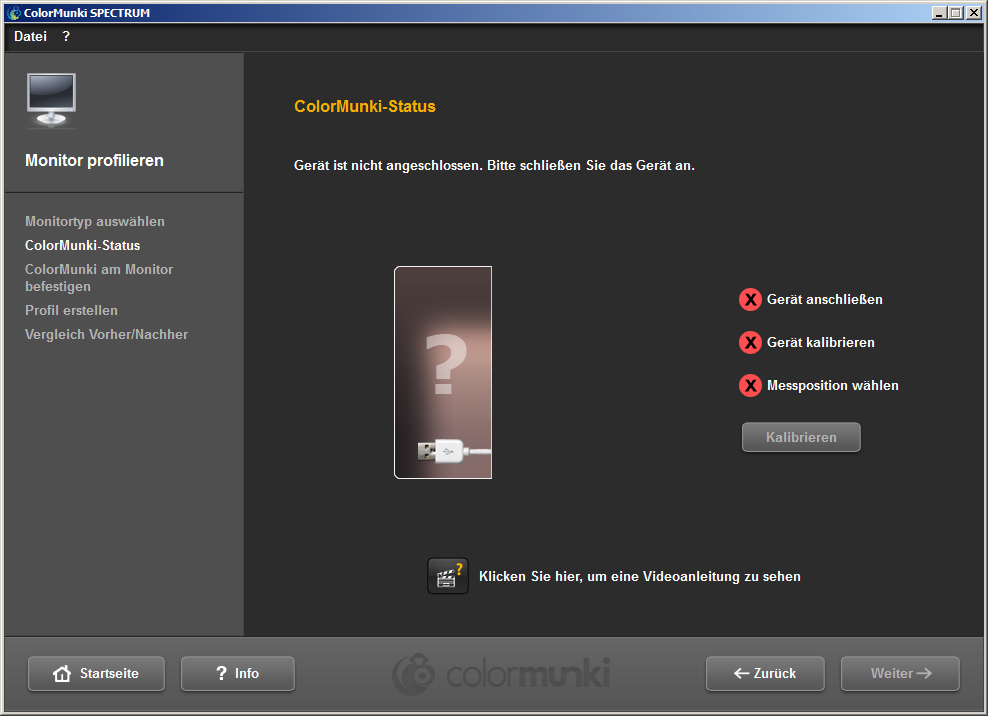 Check the connection or connect the ColorMunki to the PC using the cable provided. As soon as the ColorMunki has been connected correctly, an image of the ColorMunki will appear with a green tick next to the ColorMunki image with status "Connected".
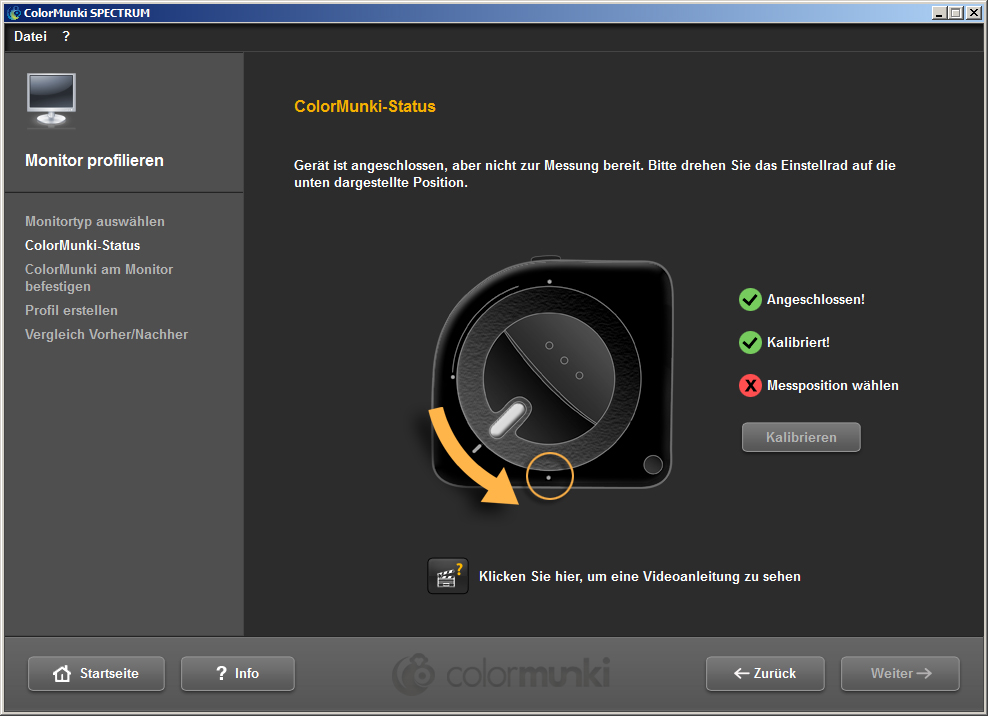
If the ColorMunki wheel is not in the right position for profiling the monitor, the ColorMunki image shows an orange arrow that points to where the wheel should be moved to. 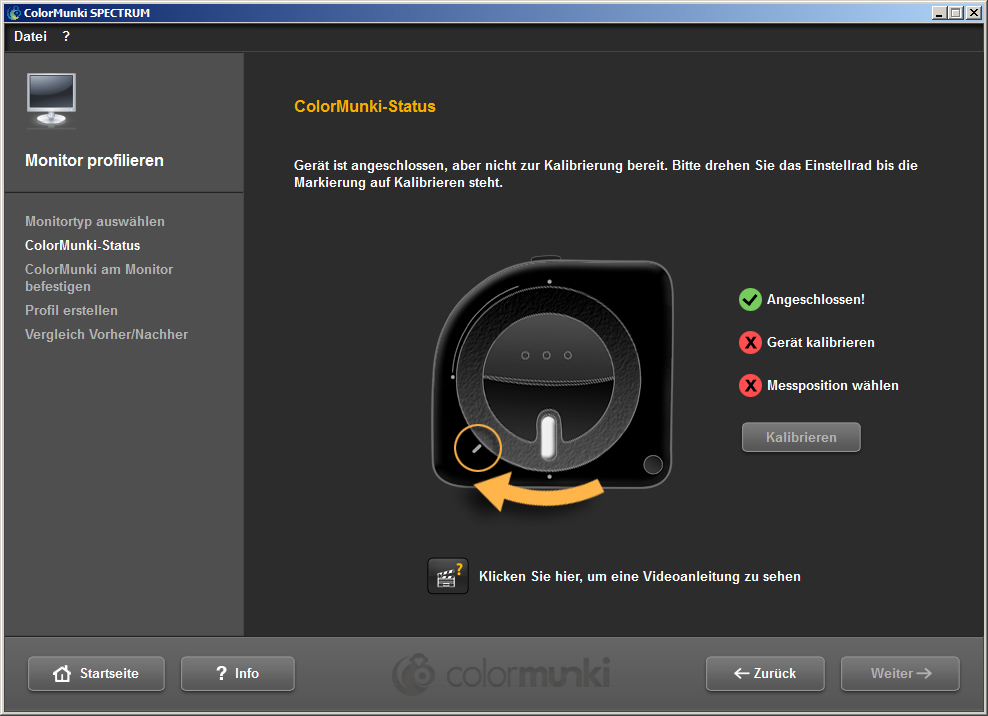
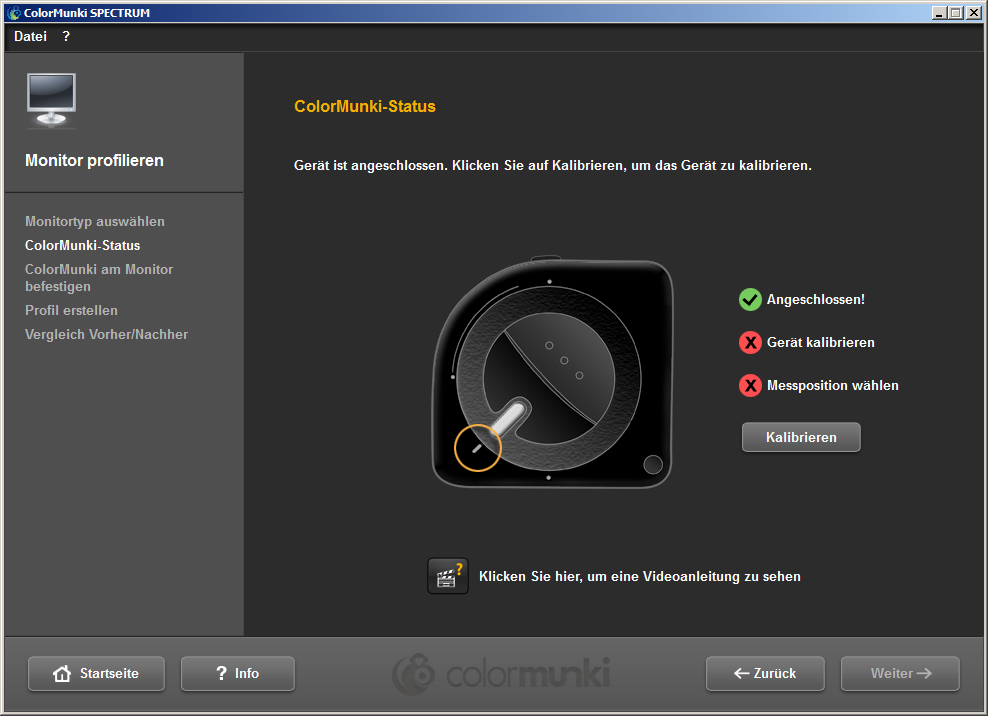 If the ColorMunki has been connected correctly and the ColorMunki wheel brought into the right position, click "Calibrate" to start calibrating the monitor. If the calibration has been carried out correctly, a green tick will appear next to "calibrated".
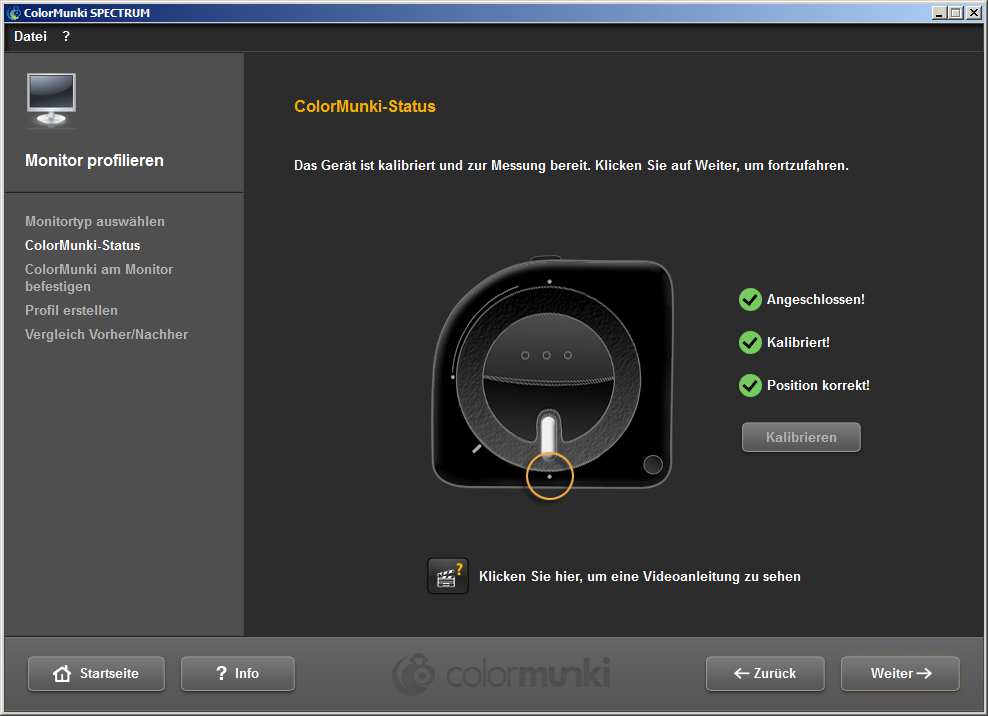
 Then move the ColorMunki to the measuring position shown in the graphic. When you have set the position correctly, a third green tick will appear indicating the correct position. Then click "Next".
 Note: Should you need further information about this dialogue, you can watch the related video instructions (Internet connection required).
Fixing ColorMunki to the display In this dialogue, SPECTRUM shows you where ColorMunki must be placed on the display. To avoid incident light, place the ColorMunki in the sleeve provided by the manufacturer first. Then fix the ColorMunki in the position shown with the aid of the weight, so that the ColorMunki remains on the display. Click "Next". 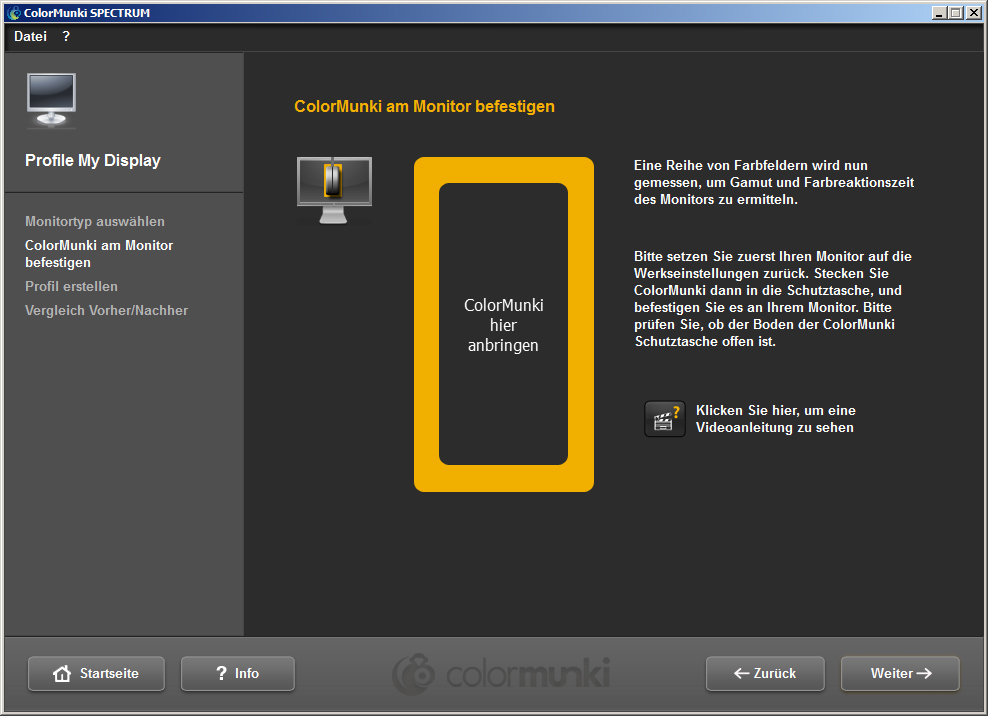 Note: Should you need further information about this dialogue, you can watch the related video instructions.
The software now outputs a series of coloured hues in different brightness on the display; these are read by the ColorMunki. Create profile After the series of colours has been imported, the "Create Profile" dialogue opens. Here, the profile created can be saved on your PC under the suggested profile name or a name you choose yourself. To do this, click "Save". 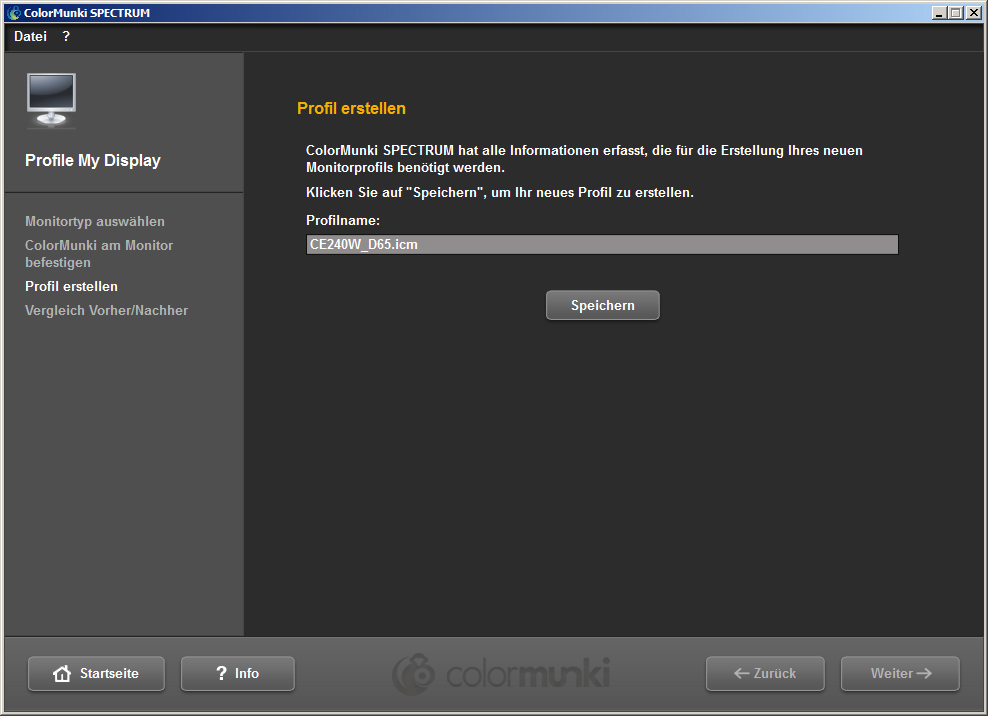 After this, you can create a "reminder date" for the new profile. Then click "Next".
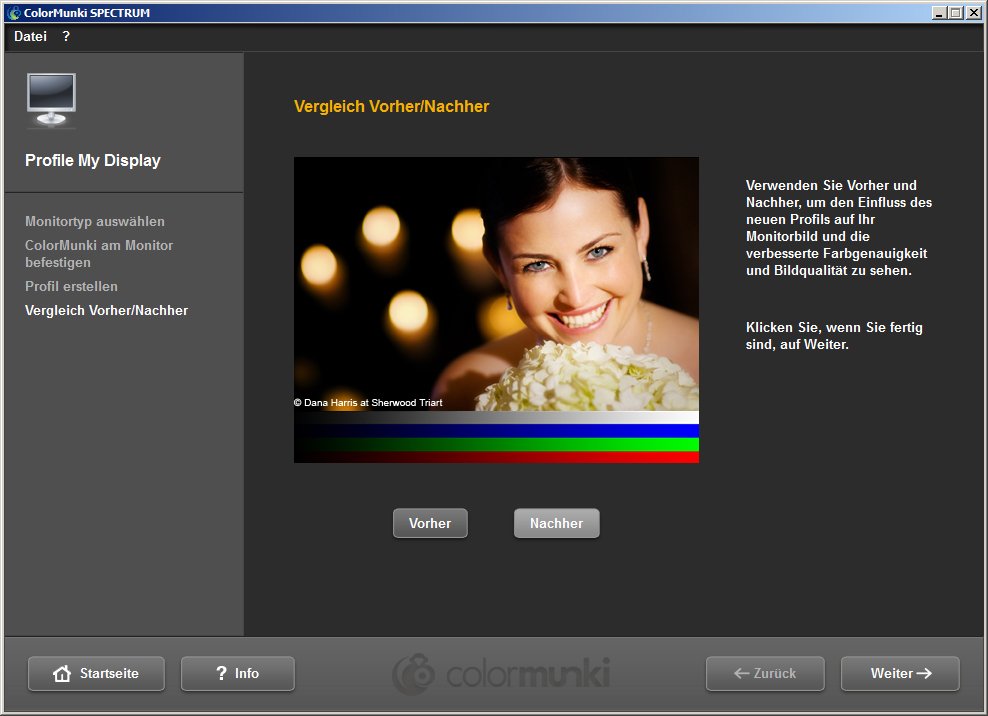
Note: If the system has not been able to carry out the profiling process properly, the profile created cannot be saved and you will receive a message that profiling has failed. Make sure that you have the necessary administration and write privileges on this PC and repeat the procedure. Comparison before/after Here you can see the change compared with the display's original profile. Click "Next" and you will be back in the start dialogue of the ColorMunki menu. 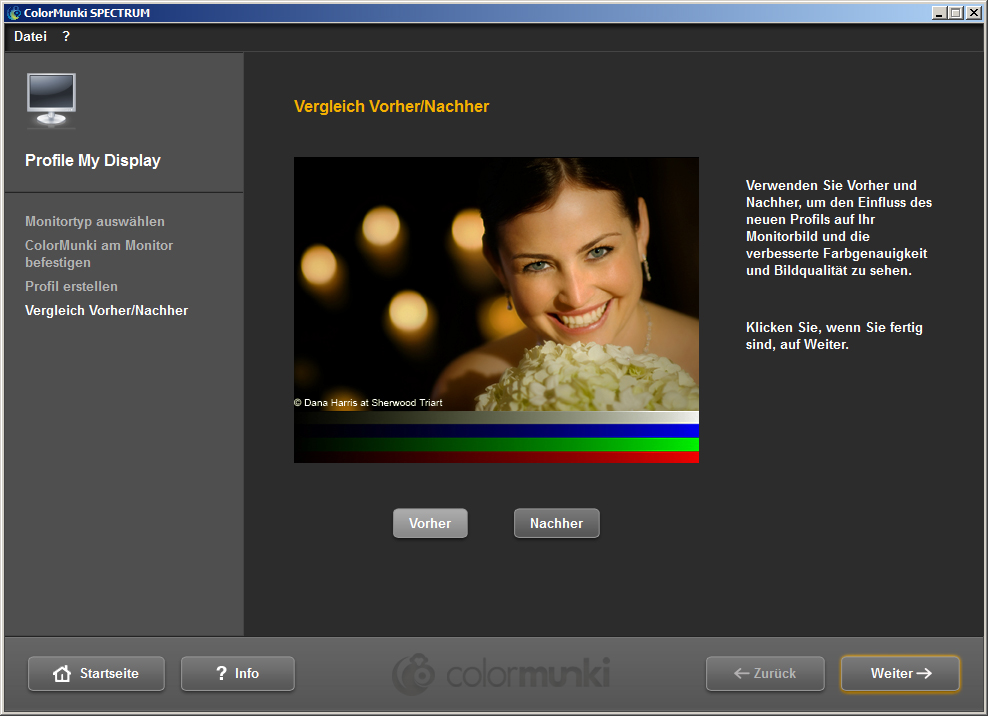
 Note: The profile created for your display using ColorMunki can be viewed, activated or deactivated in your PC's properties under "Settings">"Advanced">"Colour management" (operating system-specific).
|