
| 5. PHOTOSTUDIO 5.1 Menu bar 5.1.1 Open project 5.1.2 Save project 5.1.3 Print 5.1.4 Forward/Back 5.1.5 View buttons 5.1.6 Rocket mode 5.1.7 Help 5.1.8 Show/hide object list 5.2 "Object list" tab 5.2.1 Create/remove object list/ColorChecker 5.2.2 Object properties 5.2.3 Brightness/contrast of objects 5.3 "Prepare" tab 5.3.1 Tools: Area 5.3.2 Tools: Grid 5.3.3 Tools: Retouch 5.4 "Design" tab 5.4.1 Collections 5.4.2 Favourites 5.4.3 3D objects: CapaCoustic Melapor & NMC 5.4.4 Copy colours/materials into the object list 5.4.5 Multiview pictures |
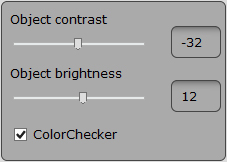
5.2.3 Brightness/contrast of objects/ColorChecker
You can use the "Object brightness" and "Object contrast" trackbars in the lower area of the object list to adjust the areas of the individual objects to portray the colours and materials as precisely as possible. The best way to configure this setting is to use the five test colours of the "Prepare" tab (see chapter 5.3.1. "Tools: Area").
 The "Object brightness" trackbar allows you to adapt the brightness of areas of your image with different exposures (e.g., façade areas in full sunshine or wall areas in deep shadow in rooms). During design work, the colours used are then correct when the test colour in the image has the same brightness as in the small test colour field.
You can use the "Object contrast" trackbar to change the contrast of areas (e.g., for diffuse image areas). Changes to brightness and contrast trackbars are always related to the areas of the object currently selected. Note: Changes to brightness and contrast directly affect the colours and materials within the objects - but not the original image. ColorChecker With this function you can check the brightness/contrast settings directly against the original colour. To do this, activate a component level in the object list and then set the tick in the ColorChecker. A rectangle with the original colour is placed over the image. With the right mouse key pressed you can move the colour in the image to the ColorChecker rectangle. If necessary, you can adjust the brightness/contrast control until the colours match. 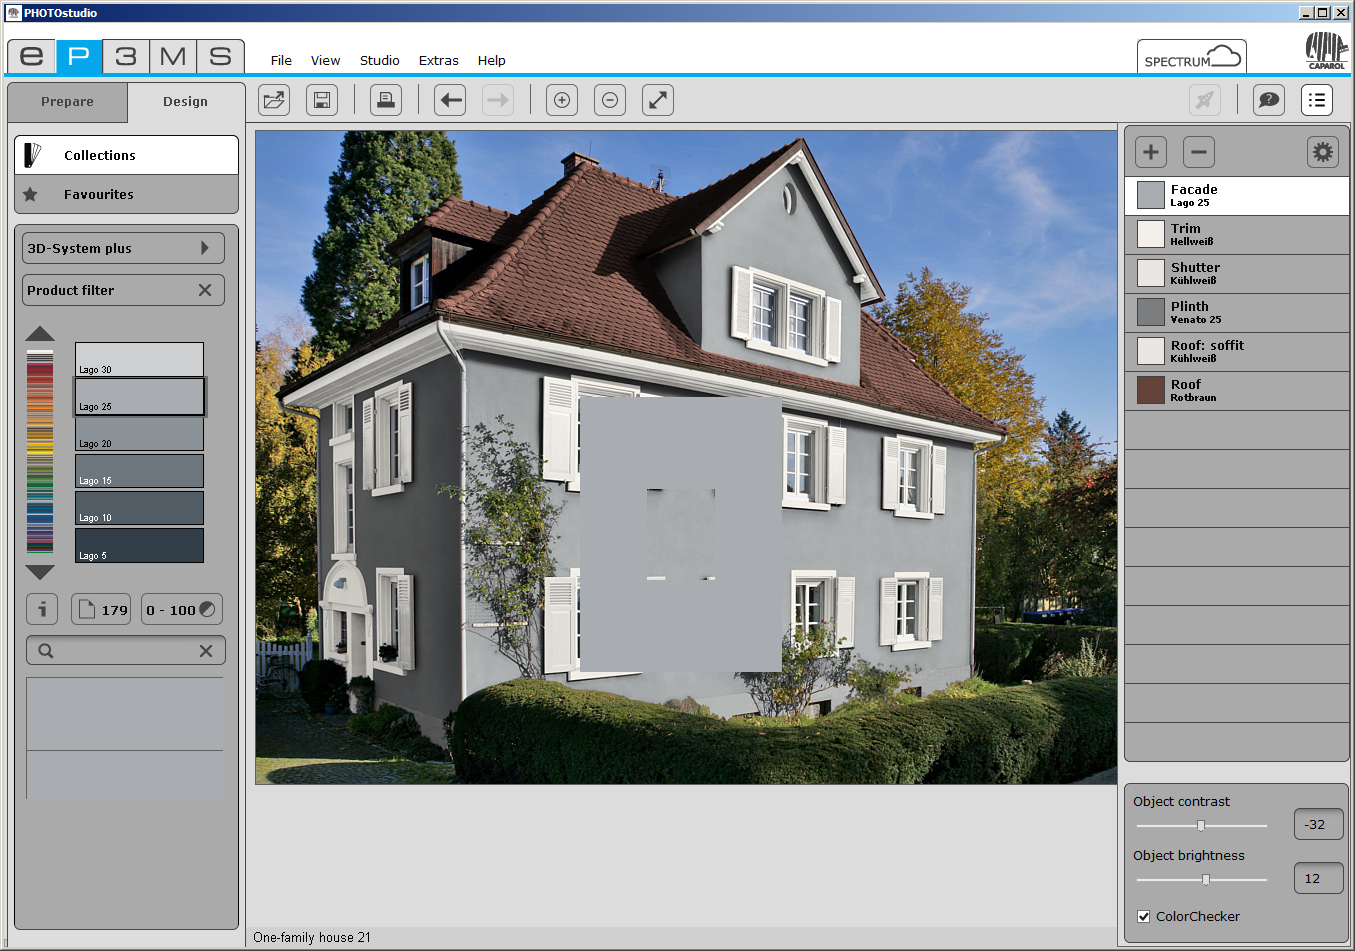
|