
| 5. PHOTOSTUDIO 5.1 Menüleiste 5.1.1 Open project 5.1.2 Save project 5.1.3 Print 5.1.4 Forward/Back 5.1.5 View buttons 5.1.6 Rocket mode 5.1.7 Help 5.1.8 Show/hide object list 5.2 "Object list" tab 5.2.1 Create/remove object list 5.2.2 Object properties 5.2.3 Brightness/contrast of objects/ColorChecker 5.3 "Prepare" tab 5.3.1 Tools: Area 5.3.2 Tools: Grid 5.3.3 Tools: Retouch 5.4 "Design" tab 5.4.1 Collections 5.4.2 Favourites 5.4.3 3D objects: CapaCoustic Melapor & NMC 5.4.4 Copy colours/materials into the object list 5.4.5 Multiview pictures |
5.3.3 Tools: Retouch
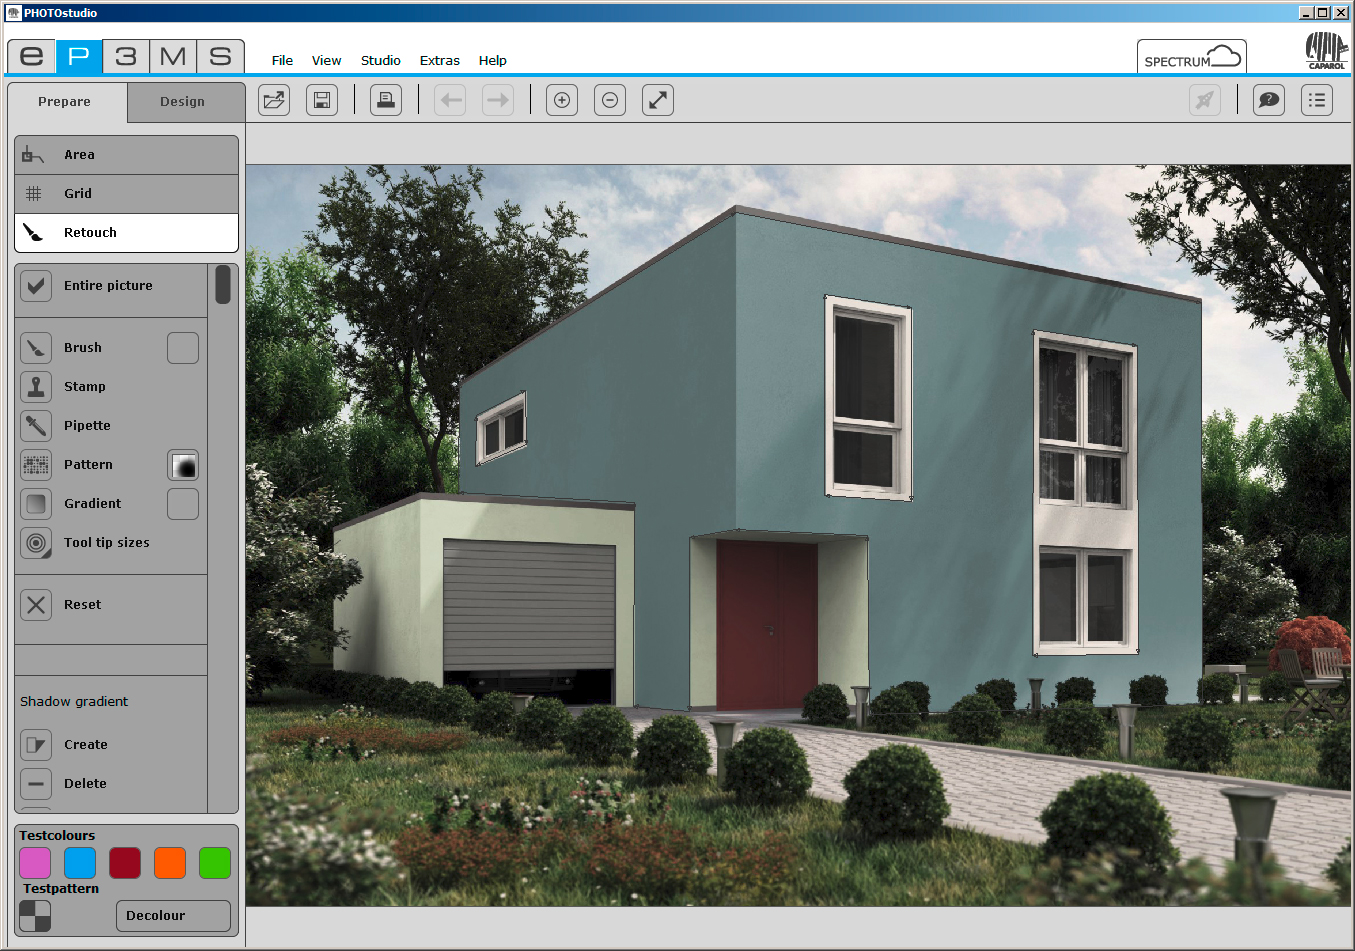 The PHOTOstudios retouch functions allow you to correct your image. It can be used to remove graffiti, clean dirty façade areas or duplicate construction elements, for example. Before you start retouching work, make sure you have defined areas for your objects (see chapter 5.3.1, Tools: Area for information on defining areas). Several different tools are available for retouching your image:
Entire picture Retouching is possible in the entire image or within individual objects. To retouch the whole image, tick the Entire picture field. To retouch individual objects, deactivate the field and select the corresponding object in the object list on the right. Brush The brush is ideal for soft contours, e.g., as shadow lines. To select a colour for the brush, click the small colour field next to the brush. A ColorPicker appears where you can enter an HSB or RGB value or select a colour from the range manually. Click OK to confirm your selected colour. For an efficient use of the brush you can choose different brush tips under Tool tip sizes. Small tool tip sizes are particularly suitable for reinforcing lines by contour drawing. The large tool tip sizes let you fill in areas quickly. If the pipette is used to take a sample from the picture, the brush can be used for optimum retouching in the same spot. The brush can be used for freehand colouring in the selected area. Pipette The pipette samples colour from the picture so that it can be applied with the brush. Select the Pipette icon and click the desired spot in the image. The sampled colour will then appear in the colour field next to the brush. You can use the brush to retouch the image with the sampled colour. Note: Choose smaller or larger tool tip sizes, as needed, for exact retouching (see Tool tip sizes in this chapter) and use the zoom function if necessary (see chapter 5.1.5, View buttons). Stamp Using the stamp tool, you can copy a section of the image and assign it to another part of the image. You can copy windows and insert them in a different place, for example, or replace dirty or unattractive image areas with clean ones.
Pattern The Pattern tool is used to adopt pattern structures in an area. To do so, click the colour field next to the Pattern symbol and select one of the eight patterns from the selection window that appear for example, grass, sky, gravel or asphalt. Draw the pattern directly into the selected object area - it is filled with the pattern. Using the "Load..." button at the lower left, you can import your own pattern and fill in the selected area with it. The minimum size of a pattern must be 1920 x 1440 pixels. Gradient You can create light-dark gradients on an area using the Gradient tool. This is helpful in covering interfering objects, large-scale soiling or conspicuous structures (bare brickwork etc.). Activate the object in question, click Gradient and choose one of the ten gradient variants offered in the window that opens. You also have the option of applying a texture to the gradient. There are three texture levels available. When making your choice, heed the simulation of different light conditions so that as realistic an impression as possible is created. In addition, you can use the trackbar to change the intensity of the gradient. Move the trackbar and click the previously selected gradient again to confirm the intensity adjustment. If you want to use the intensity together with the gradient, click OK to confirm the selection. Tool tip sizes There are four differently sized tool tip sizes available in sizes 8, 16, 32 and 64 pixels for optimum use of the Brush and Stamp tools. Reset Select Reset to undo all retouching work you have performed in your image. Shadow gradient The Shadow gradient tools allow you create your own shadow gradients for specific lighting situations for your rooms and façades. Note: A shadow gradient can only be created when a defined area is available. Create To create a new shadow gradient, click the Create button and enter a unique name in the dialogue window. Then click OK - the newly created shadow gradient appears in the list. In addition, a grid will appear in your workspace which you can position anywhere in the image. It provides the shape for the shadow gradient. Move the grid points and lines to the required position. All the shadows created are listed by name in the field below - where they can be selected and then changed or deleted. Delete If you would like to remove a certain shadow gradient, choose the respective gradient from the list and click the Delete button. The selected gradient is removed from the list and deleted from the image. Apply To apply the shadow gradient, click the OK button (Apply) - the shadow is intensified (becomes darker) by clicking the OK-Apply button several times.
|