| 5. PHOTOSTUDIO 5.1 Menüleiste 5.1.1 Open project 5.1.2 Save project 5.1.3 Print 5.1.4 Forward/Back 5.1.5 View buttons 5.1.6 Rocket mode 5.1.7 Help 5.1.8 Show/hide object list 5.2 "Object list" tab 5.2.1 Create/remove object list 5.2.2 Object properties 5.2.3 Brightness/contrast of objects/ColorChecker 5.3 "Prepare" tab 5.3.1 Tools: Area 5.3.2 Tools: Grid 5.3.3 Tools: Retouch 5.4 "Design" tab 5.4.1 Collections 5.4.2 Favourites 5.4.3 3D objects: CapaCoustic Melapor & NMC 5.4.4 Copy colours/materials into the object list 5.4.5 Multiview pictures |
5.4 Design tabDesign imagesAs soon as all the areas and grids have been created for all the required objects of your own image, you can start design work in PHOTOstudio. You can always switch between the Prepare and Design tabs. 5.4.1 Collections  The Collections field is available for the selection of a colour or material collection. In addition to the Caparol colour and material collections, you can also use the collections you have created in the EXPLORER and sample material and collections from our partner manufacturers.
Collections
The Collections field is available for the selection of a colour or material collection. In addition to the Caparol colour and material collections, you can also use the collections you have created in the EXPLORER and sample material and collections from our partner manufacturers.
Collections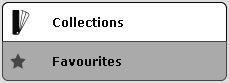 Select collection
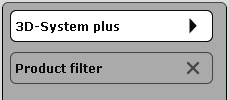
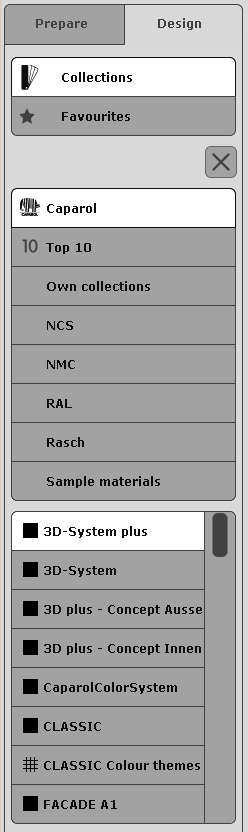
First select the Collections field. The 3D-System plus collection is selected by default in the field below. Click this field to display the overview of all manufacturers and their collections.
"Colour" icon The filled-in, black square before a collection indicates that this collection is a pure colour collection without materials. "Texture" icon The mesh before a collection indicates that this collection is a collection with materials, possibly combined with colours. Note: The profiles of manufacturer NMC and the Melapor modules have special handling under the collections. They are described separately in chapter 5.4.3, 3D objects: CapaCoustic Melapor & NMC. ColorPicker Directly beneath the collection display field, you see the ColorPicker, in which you can select the colours and/or materials to design your image.
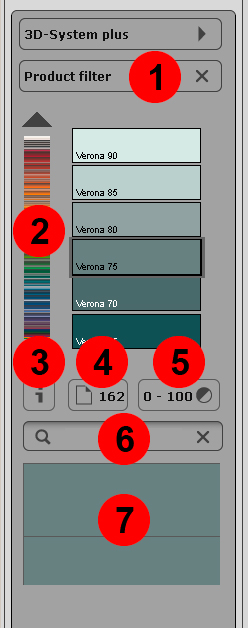
You can use the product filter to limit your selection to a certain basic material. You are then only shown the colours that can be produced in this product. If you want to cancel the filter for a product, choose (No product) in the list. Colour trackbar You can navigate through the currently selected colour selection using the colour trackbar. Click the respective point within the colour spectrum shown to select a colour range (red, yellow, green...) or move through the collection by dragging the trackbar with the left mouse button pressed. When you click the arrow keys, the colour selection jumps to the next colour kit.  Display product details Click the i button to display information about the name and additional details of a product. Alternatively, you can also double-click the colour/material to open its detail window. (See chapter 4.3.1, Colour and material selection). Search by page number in original kitr 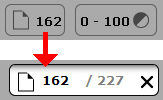 To select a specific page of the original colour/product kit of the selected collection, click the icon with the page number. An input field appears where you can enter the desired page number of the collection kit. The colour field display jumps to the given page when you click the Enter key. Lightness value  The lightness value filter lets you restrict the colours of the selected collection to a specific range. Click the lightness value icon and enter the minimum and/or maximum values in the fields, or use the arrow keys to move the trackbar to the desired values. The colours that lie outside the configured range are hidden automatically. This is helpful, for example, when a lightness value of 20 should be the minimum limit for façades with heat insulation for technical reasons. Click X to close the field. All changes made so far are retained. Note: Set the values in the lightness limits to 0 and 100 again to have all the colour fields of a collection shown. Full-text search To search for a specific colour name within a collection, enter the name in the search field and press Enter to confirm. If you enter Ginster 110, for example, only the colour hue is displayed; if you enter only Ginster, all colours from the Ginster colour family are displayed. Click the X at the top right edge to return to the colour selection window. Colour preview/colour selection When you move the mouse pointer over the individual colour fields, the pattern the mouse is currently on is shown in a small preview window. This function permits you to compare two samples. As soon as you have selected a colour or material pattern with a single click, it fills the selection window. The currently selected pattern can now be used to design an area.
Apply CONCEPT With the Concept design fans you have the possibility of automatically transferring a complete harmony to a facade or interior room in the library. The main and accentuated walls as well as other components such as plinths or skirting boards are taken into account here. Select an appropriate harmony in the Concept fan and click on the "Apply CONCEPT" button. The colours are transferred to the library picture. You can change the arrangement of the colours in the picture with the dice function. Each click on the "Dice" button changes the colour assignment. The assignment to the individual components is no longer taken into account. It might occur that an enamel colour is assigned to the facade by the dice. Note: The "Apply CONCEPT" button only functions with a library picture. Note: The following collections have an "Apply CONCEPT" button: 3D plus - Concept Exterior, 3D plus - Concept Interior and Facade A1 CONCEPT. 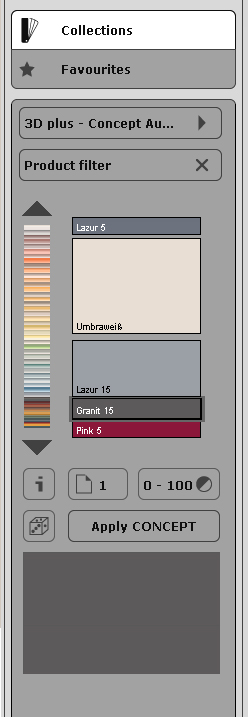
|