
| 5. PHOTOSTUDIO 5.1 Menüleiste 5.1.1 Open project 5.1.2 Save project 5.1.3 Print 5.1.4 Forward/Back 5.1.5 View buttons 5.1.6 Rocket mode 5.1.7 Help 5.1.8 Show/hide object list 5.2 "Object list" tab 5.2.1 Create/remove object list 5.2.2 Object properties 5.2.3 Brightness/contrast of objects/ColorChecker 5.3 "Prepare" tab 5.3.1 Tools: Area 5.3.2 Tools: Grid 5.3.3 Tools: Retouch 5.4 "Design" tab 5.4.1 Collections 5.4.2 Favourites 5.4.3 3D objects: CapaCoustic Melapor & NMC 5.4.4 Copy colours/materials into the object list 5.4.5 Multiview pictures |
5.3.2 Tools: Grid
 Add grids to objects
To ensure that an object is displayed with the correct perspective and scale not only with colour, but also with materials (e.g., spatula techniques, fabrics, carpets, tiles, ...) during design work, a grid is required in addition to the area. The grid is superimposed directly on the area as a reference and provides information about the size and type of perspective distortion for the respective object. Note: To create a grid, at least one area must exist within an object (see chapter 5.3.1, "Tools: Area"). Create grid To create a grid, first select the respective object in the object list. Then proceed as follows:
Note: Only one grid can be created per object. Therefore, you should make sure that all the object areas are on the same perspective level. If wall areas have different perspective distortion, create a separate object - with area and grid - for each area. Curve grid You need the curve grid for materials which are to be laid around columns or curved walls.
You need the corner grid for materials which are to be laid around corner pillars or wall corners.
Note: To continue the grid around several corners, repeat the line insertion step above. Move Move the grid into the right position and perspective by selecting the "Move" tool and dragging the corner points or outer lines of the grid to the required position with the left mouse button pressed. Reference lines are used as support for the creation of the grid with the correct perspective; they will help show you the current vanishing point of the grid. Delete grid To delete a grid that has been created, click the "Delete grid" symbol and confirm deletion by clicking "Yes" in the dialogue window that opens. Adjust grid dimensions 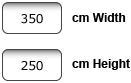 To ensure that the materials you add during design are represented as realistically as possible in terms of size dimensions, the grid has to be assigned the dimensions that correspond to the original object area. To do so, change the default size setting from width 350cm x height 250cm to the actual dimensions. An indication of the correct takeover of the new dimensions is a grid check on the basis of a test pattern. Test pattern for grids 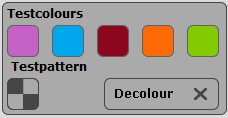 In order to check whether the grid has the correct perspective and dimensions for later material design, you can assign it a temporary test pattern. The chequerboard pattern is displayed larger or smaller depending on the entered dimensions (grid width and height). Important: If the test pattern does not display squares, the proportions of the dimensions you entered are incorrect. To improve the aspect ratio, correct the values of the grid dimensions and click the "Test pattern" button again to check it. If you keep incorrect dimensions, the material used for design (wallpaper, spatula technique...) will not be displayed realistically. To remove the test colour, click the "Decolour" button. Note: The test pattern is only for fine adjustment of your grid for later material application - it is not visible in the actual image during design.
|